
Ideate BIMLink: BOMA Calculations
Earlier this year, I presented some ideas to a focus group on how Ideate BIMLink can be leveraged to gather Area Plan data related to BOMA. Area Plans were chosen over rooms, because Area Plans can have multiple schemes, which are easily separated by views and scheduling. In addition, the Project Browser will separate the Area Schemes by each type, making navigation much easier. Rooms are more challenging to attempt in this manner and can confuse data with other room-specific information. In addition, the room boundary lines are determined by a global Revit setting, whereas Area boundary lines are determined manually or by Area rules.
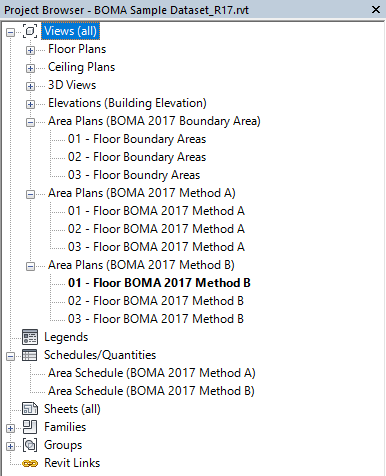
Area Schemes Created for BOMA
This image of the Project Browser depicts the different Area Schemes created for the BOMA for Office Buildings Standard Methods of Measurement. In this case, we have one scheme for the overall BOMA boundary area and a scheme for both Method A and Method B. You can see that the browser organization is much easier to understand.
The BOMA references presented were the BOMA 2017 for Office Buildings, Method A (Multiple Load Factor), and Method B (Single Load Factor). Regardless of which method is used, the end results will be the same.
After creating Area Schemes for Method A, Method B, and the Boundary Area (not to be confused with Gross Area – they are not the same in this context), the user will need to reference the BOMA guide to understand where the Area boundary lines are to be placed. For example, if you have a Tenant area next to a Floor Service Area, where does the demising Area line reside? The BOMA guide is very specific about these details.
Example
Shown below is an example of a BOMA 2017 for Office Buildings Method B Area Plan with a Color Fill legend applied in Revit. Each Area type (Base Building Circulation, Floor Service Area, etc.) has been depicted as a BOMA Space Classification, which then translates to a color in the Area Plan. The Area boundary lines were determined based on the rules laid out in the BOMA guide.
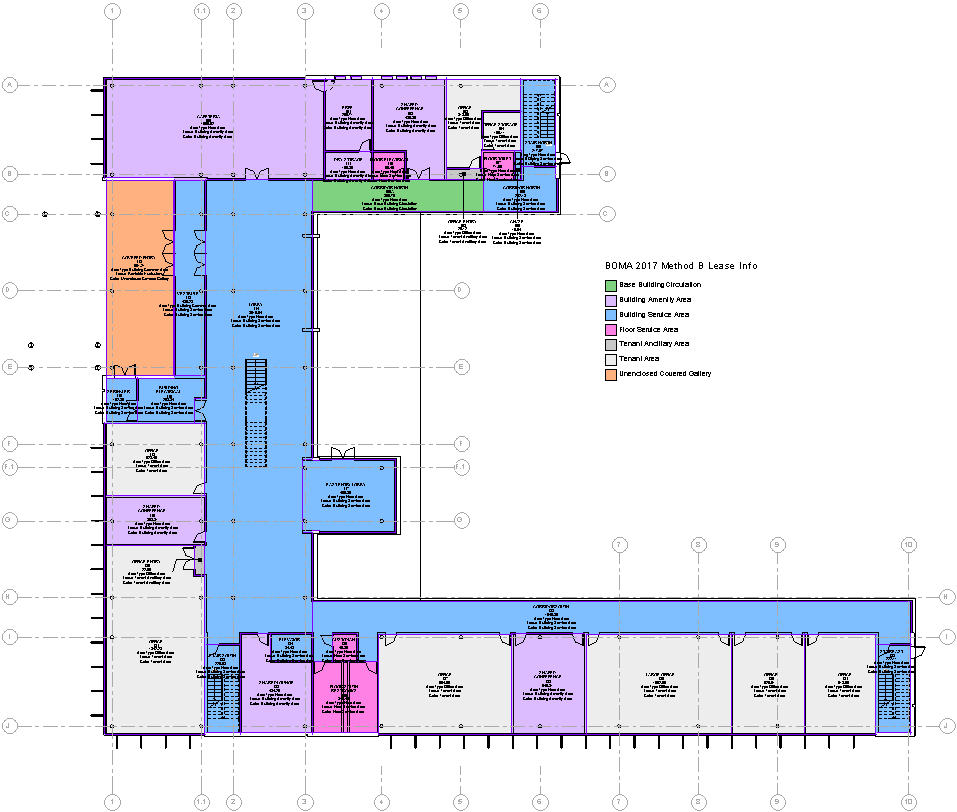
Once the Areas have been placed, named, and numbered, the user has the option to set the BOMA Space Classification (Building Service Area, Floor Service Area, MVP, etc.) which is used for the BOMA datasheet. The user also has the option to set another value for the color of the Area to be represented in plans. These colors are set to match the colors in the BOMA guidelines.
Gathering Area Data from Revit to Excel Using Ideate BIMLink for Easy Editing
What was then presented to the focus group was how we can gather the Area data from the Revit model using Ideate BIMLink and push that data to an Excel file. While an Area schedule for each BOMA Method is easy to create natively in Revit, one issue that arises is how to combine the Boundary Area schedule with both the Method A and Method B schedules, since you cannot add schedules together.
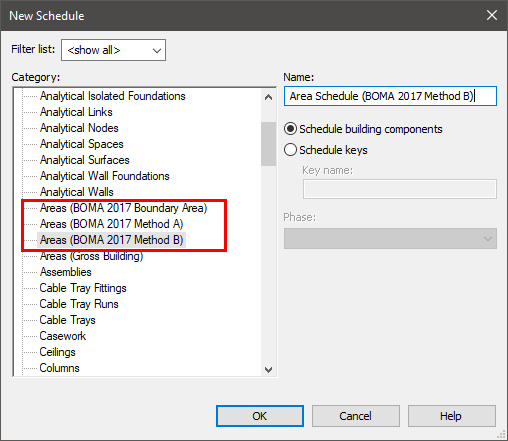
Here is an example of the New Schedule option that shows the schedule categories separated. Adding them in Revit is not possible.
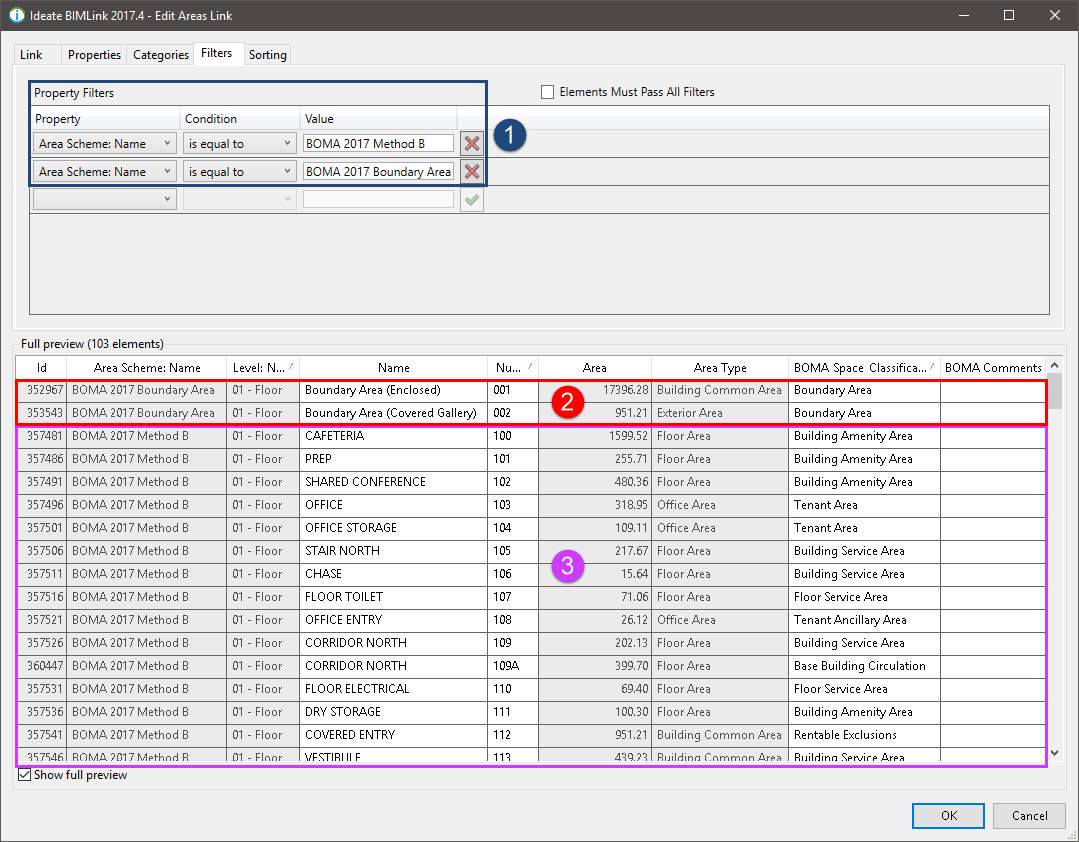
In Ideate BIMLink, it is easy to create a link that lists all areas, no matter what the Area Scheme is. This allows a user to export a lot of Area data to one spreadsheet. For us to export the data for only the overall Boundary Area and a BOMA Method, we need to go to the Filters tab (see below image) and filter the data to show only the Area Scheme for Method A or B and the Boundary Area (1). Once the filter is applied, the data that Ideate BIMLink reports will show all the Boundary Areas (2) and all the areas that belong to the filtered Method A or B (3). Once this data is properly gathered, it can then be exported to Excel.
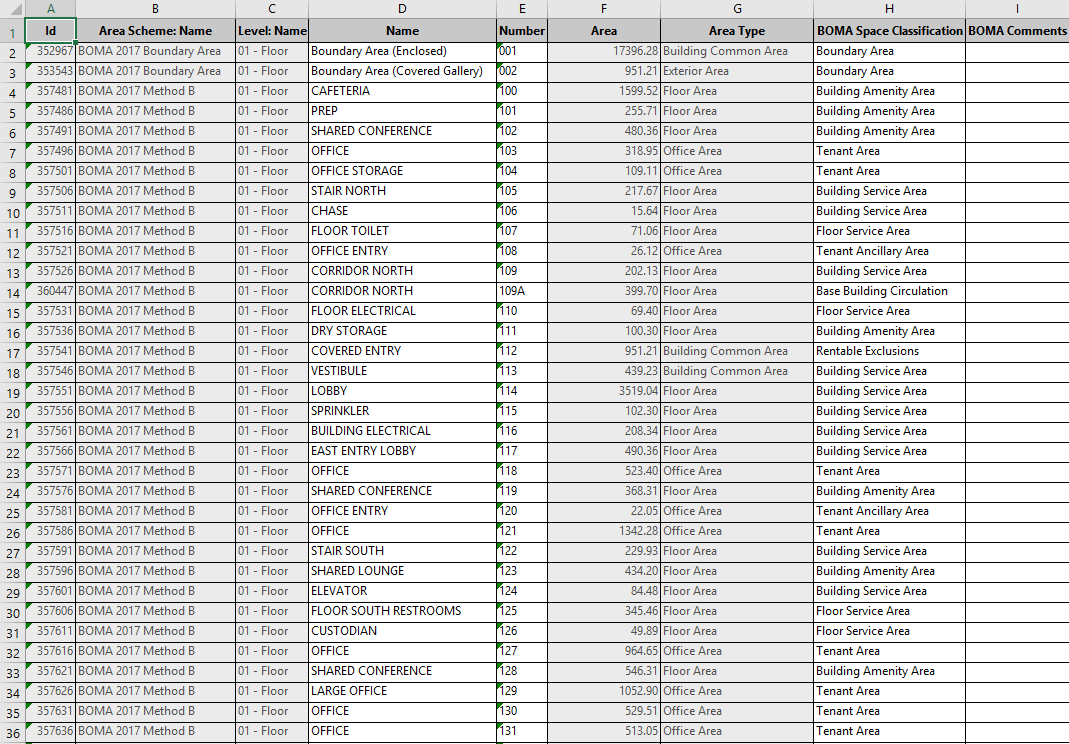
Here is an example of what the raw data export from Ideate BIMLink would look like. You can see that the data is well organized and very thorough.
Options for Restructuring Data for a Leasing Document (BOMA Global Summary of Areas)
For this data to be presented in a leasing document (BOMA Global Summary of Areas) that a client would be interested in, you will more than likely need to take the summarized Ideate BIMLink data and restructure it. Here are a few options regarding restructuring the data:
- Use this data to then manually fill in a BOMA spreadsheet that has formulas set in the correct cells. This method has a lot of downsides because doing manual entry can be time consuming and error prone. Any changes to the BOMA data will require the user to revisit the BOMA spreadsheet for manual updates.
- Create a series of Pivot Tables that references the raw data from the Ideate BIMLink export and compose them so that they match the BOMA guidelines for the leasing data tables. The upside to this method is that there is no need to write any Excel macros to structure the data. Also, Pivot Tables have a low learning curve, though they can get tedious at times because formatting them to your liking can take some time.
- Write a macro inside an Excel template that gathers all the data from the Ideate BIMLink export and then structures that data to match the look and feel of the leasing table that the BOMA guide references. The upside to this method is that once you get the macro dialed in, the look and feel of the table should be consistent.
Example BOMA Global Summary of Areas Table
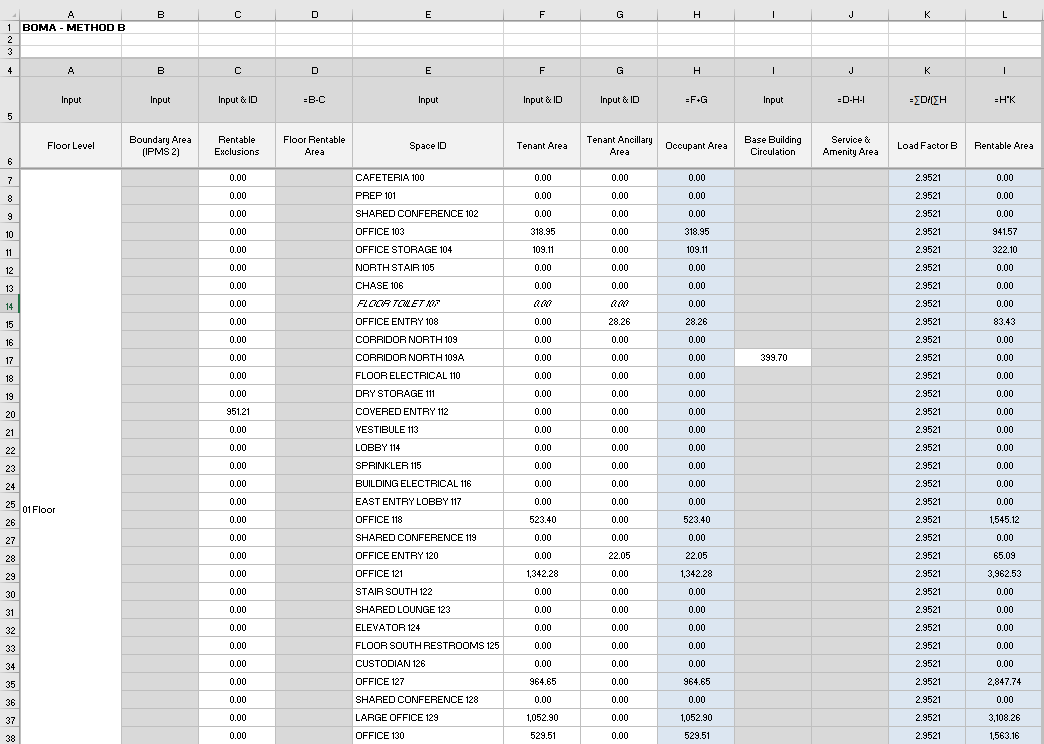
Shown here is an example of a BOMA Global Summary of Areas table formatted to match the BOMA guide. This table can be created by using a Pivot Table or a Macro that references the data that was exported out of the Revit model through Ideate BIMLink. Trying to enter this data manually in this table is time consuming and error prone.
Updating Data in the Revit Model
If the data needs to be updated in the Revit model, all the user would have to do is re-export the data using Ideate BIMLink into the same Excel file that contains the original raw data from Ideate BIMLink. The Pivot Table or Macro that reads the raw data will refresh to reflect the updated data from the Revit model.
Whichever method you choose, you can easily use Ideate BIMLink to gather all your BOMA data and push it out to Excel, so you can use your preferred methods of generating and maintaining the leasing data tables.
Existing Ideate BIMLink customers on current subscription are welcome to request access to our Revit 2017 BOMA sample dataset.
Explore recent posts